Followers

About Me

My photo
I wargame in 20mm, primarily using Command Decision 3, but have been tempted into other systems. I have a tendency to adapt CD to suit other periods with varied results! I take awful pictures and am at best an average modeller and painter, but hopefully quantity will have a quality all of its own.

Sunday, 6 May 2012

The 1979 Hakim Oasis Incident, Pt. 2.

The Archduke has put up two more parts of his very detailed AAR report on our game last Sunday. Part two is here, and part three is here. The Archduke's reports are quite good, and his photographs are superb. Full CD3 TOEs are listed here. My own efforts continue below:

Imperial forces on the move!

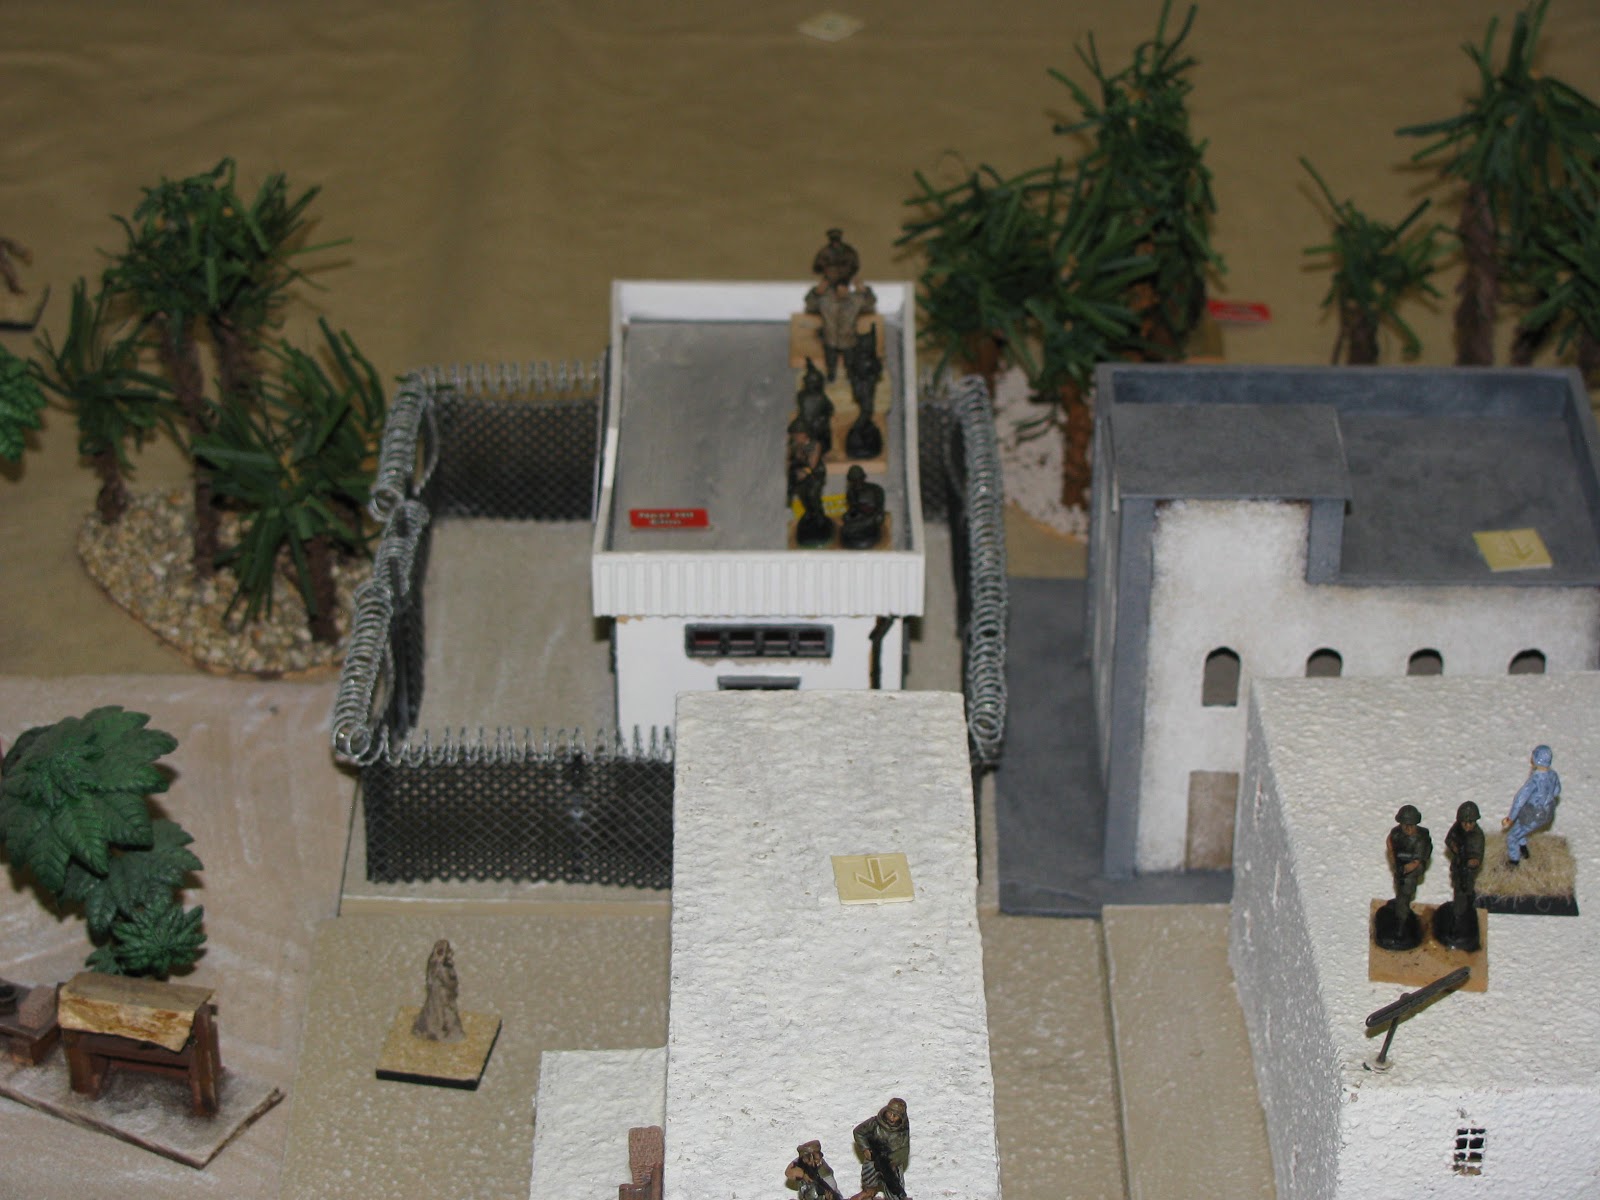
The Imperial forces resident in Hakim started a limited sweep across the town, whilst maintaining a sizable garrison within the Police station compound. Outside the town, the infantry of the Imperial relief column started to enter the outskirts of the town, while the relief column's armoured car company, and RCL company, moved to engage the first of Diesela Khann's technicals.

First blood to the Rebels!
The Imperials were somewhat surprised by the ability of technical mounted RCLs to take out armoured cars. This was matched by the ability of the Imperial forces to take out the technicals. as they are only soft vehicles, direct fire HE is quite effective on them!

A bad day for the Heavy group!
That, coupled with the low morale of the technicals, led to the surviving platoon failing its morale check and fleeing for cover in the Village of the Infidels. While the first of the mobile forces were engaged outside the town, the central thrust of the Imperial garrison's sweep towards the mosque encountered a group of the Arch Mullah's Brotherhood of the Faithful, and after a brief firefight, was forced back to the Police Station.

An Imperial infantry stand is halted in its advance towards the Mosque.

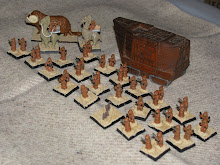
Surviving Diesela Khannite tribesmen take time to review the days events.

On the other side of  town, the forces of the PLFK advanced into the outskirts of Hakim, while government allied tribesmen moved to intercept them.The PLFK armour, nervous at the smell of camels, failed its morale and withdrew back to its original position. Meanwhile, the other Imperial armoured car company swept around the town, only to bump into the other group of technicals.

Another Saladin lost to RCL fire.
The usual exchange of fire occurred, only this time the technicals, aided by PLFK Saladins, managed to gain the upper hand. Two Imperial Saladins were destroyed with the third platoon forced back, atfer failing its morale.


And the return fire destroys the RCL armed technical.
 The RCL armed technicals were proving to be quite a powerful, if somewhat fragile unit.

But the Khand armoured cars manage to destroy another, and hit the other.

Although they lose one to return fire from the Imperial armoured cars.
The remaining technicals hold the field. Shortly after this picture they were reduced to burning wrecks by Imperial action.

 By this stage the Imperials had managed tom get a TOW stand into a position to engage the technicals. This resulted in the elimination of the technicals as a fighting force. The next logical step was for the Imperials to remove the threat of the PLFK armoured cars. The TOW armed Mule, and the two remaining Saladins of the relief column, started towards the PLFK Saladins. The mule out paced its armoured escort and was destroyed by the PLFK during the opportunity fire phase.

Imperial armoured cars ignore the Mullah's mortars and drive towards the PLFK armoured cars.

Burning Imperial armoured cars.
The survivor reflects on the days events.

 This exchange began a series of exchanges of fire between the two groups of armoured cars, as neither wished to take the risk of getting closer to increase the effectiveness of their fire, and thus that of the enemy.

 While both sides mobile elements were in the process of destroying each other, the Imperials made another effort to sweep through to the Mosque and solve their Mullah problem. Alas, for the Imperials, they managed to launch their attack after the PLFK had finally managed to link up with the Arch Mullah's troops. This resulted in a quite substantial increase in the available defenders for the Mosque.

The PLFK finally link up with the Arch Mullah's men.
And move to reinforce the mosque.

The Mosque became the focal point of the urban battle. At one stage it was only held by the Mullah, and two somewhat depleted stands of infantry.

 The Imperial assault was conducted by the dismounted infantry of the relief column, who had been working their way through the town towards the mosque all day. Had the rebels lost the Mosque, I would have conceded the day to the Imperials. Fortunately, I managed to roll well, and gun down the Archduke's Imperials.

The Imperial Motorised Infantry company launch their assault on the Mosque.
And are repelled.
The survivors are forced back.
The Mosque holds.
 Having the PLFK close enough to be able to consolidate the Mosque's defense, meant that there was little point in the trained bands of the Citizens' Defense Militia trying to achieve what the Imperial army had failed to do. 

Rebel forces plan their next move.
The imperial garrison prepares for night, and a siege.

The action ended at this point, as neither side quite had the forces to dislodge the other, and it was in the interests of the Mullah to renew operations under the cover of night - where the superior troop quality of the Brotherhood, and the PLFK, could be used to good advantage against the loyalist militias.

The last of the gunfire stops as both sides wait for night.
The days fighting resulted in both sides claiming a slide edge over the other, but since neither was able to dislodge the other from the town I feel it was most likely a draw. overall it was a very pleasant and enjoyable game, for which I must thank the Archduke for being such a genial opponent!

Wednesday, 2 May 2012

The 1979 Hakim Oasis Incident, Pt. 1.

Last Sunday I played a game of CD3 Moderns with the Archduke down at the Woolston Club. The game itself was a nice little scenario set in Harad. The game took place in late 1979, a time of great uncertainty in Harad, in a small provincial town called Hakim, built around the Oasis of the same name. Hakim is a town in Northern Khand, a traditionally rebellious territory of the Empire. (The Archduke has a very nice write up of the game posted here. Plus the photos are much better.)

Hakim, named after the oasis.
Due to the rather ungrateful attitude of some of the Khandish locals to the benefits of Haradian rule, the Empire has stationed small military garrisons in the major settlements of Khand. These towns are administered by military governors, who report directly to the local provincial governor. Officers who receive the honour of of a military governorship in Khand, have often done so due to the result of committing a career limiting move at some earlier stage in their career.

For this game, I gave the Archduke the choice of four different factions. Once he had chosen his core force and faction, I would then given him the rest of this forces and explain to him the current situation as his faction saw it. The Archduke's initial choices were as follows:

.
Bringing the joy of Marxism to the People of Khand.

Peoples' Liberation Front of Khand (PLFK)-Troop Quality: Regular, Morale: 8.
 HQ w/
  1 Command  Stand
1 Infantry Company w/
   1 RPG-7 Team
   3 Infantry Stands
1 Armoured Car Company w/
   1 Command Saladin Armoured Car
   1 Saladin Armoured Car

The relief column, Friend or Foe?

Imperial Relief Convoy - Troop Quality: Experienced,  Morale: 9.
 Motorised Infantry Company w/
  1 Command  Stand
  1 Landrover
  2 Infantry Stands
  1 Weapons Stand
  3 Light trucks
  1 Mechanical Mule w/ TOW
1 Armoured Car Company w/
  1 Command Saladin Armoured Car
  1 Saladin Armoured Car


Just how loyal is the Governor?

 Imperial Garrison - Troop Quality: Experienced,  Morale: 9.
 Imperial Infantry Company w/
  1 Command  Stand (Military Governor)
  2 Infantry Stands
  1 Weapons Stand
  1 TOW Stand
 1 Armoured Car Company w/
  1 Command Saladin Armoured Car
  1 Saladin Armoured Car

The Arch Mullah has quite a few friends...

The Arch Mullah of Hakim - Troop Quality: Experienced,  Morale: 12.
Brotherhood of the Faithful w/
  1 Command  Stand (The Arch Mullah)
  1 Command  Stand
  2 Patrol Stands
  3 Infantry stands
  1  81mm Mortar Stand (DS)
  1 Ammo Porter Stand (DS)

The faithful are well equipped with WARPACT weaponry...

While the basic premise of the gane was that there existed possible revolt in Hakim,  exactly what the situation was going to be would be determined by the Archduke's choice. if he had chosen the relief column, then the rebellion was going to be led by the Governor in league with the PLFK, choosing the PLFK would have the relief column be in league with the PLFK against the Governor and the Mullah combined as Imperial loyalists, and choosing the Arch Mullah would have generated a large horde of the faithful against all comers.

Since the Archduke chose  to be the Governor, then the relief column was on his side, and the rebellion was that of the broad base Khandist Popular Front (KPF), with the Mullah's forces and the PLFK acting together for the sake of liberating Khand from the evil foreign oppressors....

It also meant that the Archduke's forces were increased, with each armoured car company gaining an additional Saladin, and the relief column gaining an additional company of 106mm Recoilless Rifles.

An expanded Relief Column prepares to advance.

 Imperial Heavy Weapons Company w/
  2 106mm RCLs
  2 Gun Crew Stands
  2 Light Trucks

Imperial forces were also swelled by the additional of the local Citizens' Defense Militia.

Citizens' Defense Militia - Troop Quality: Trained,  Morale: 8.
 Militia Infantry Company w/
  3 Infantry Stands

and if that wasn't enough, the Archduke also got to treat the Police HQ building as having the effects of  a Staff Radio Staff, for as long as the Governor remained within the building. Plus, he also got to dice to see if his rousing speech could sway addition forces to the Imperial cause - and it did! Additional forces came in the form of  local tribesmen, who provided a strong mounted element to the Archduke's force:

Mounted Tribesmen - Troop Quality: Trained,  Morale: 8.
Tribal Force w/
 1 Mounted Command Stand 
 2 Cavalry Patrol Stands
 4 Camelry Patrol Stands

Each pair of Patrol stands is able to combine into a Recon stand of the appropriate type.

Of course, the rebel forces also gained some additional reinforcements, firstly the PFLK also gained an additional Saracen for their armoured car company, and the KPF also gained the support of some of Diesela Khann's tribesmen, mounted in their technicals:

The 'Light Group" of Technicals - Diesela Khann drives again!

Tribal Motorised Force - Troop Quality: Trained,  Morale: 6.
Light Group w/
 1 Command Jeep
 1  Technical w/ 106mm RCL
 3 technicals w/ HMGs
Heavy Group w/
 1 Command Technical w/ 40mm AGL
 1 Technical w/ 40mm AGL
 1 Technical w/ 106mm RCL

Places everyone!  Ok?!  Action!

Now that both forces were sorted and deployed in their starting positions, the battle could commence! Stay tuned for part II soon.

EDIT: Minor typos corrected, and labels added.

Tuesday, 1 May 2012

WW2 Italians WIP

After the recent success of my Italians, I decided to create some additional elements to give them a better chance against Mr K.'s US forces. First off, I dragged out a nicely painted HO scale figure of  Mussolini from the Rocco Leaders set, and stuck it on a nice GW 20mm x 20mm base to give him some height.

Edit: Not painted by me - acquired painted second hand over 12 years ago.

While not strictly a fieldable unit, it does give me the option a nicely painted senior officer to use as a Command stand. Most likely though is that I will base it up and stick it in a box until I can display it safely (we still get the odd aftershock here, and the vibrations from the trains are significantly worst than before the earthquakes due to damage to the piles, still others have it much worse). While aspects of  Fascist Italy were better than in the Third Reich, it was still a totalitarian state that waged aggressive and expansionist wars, whilst repressing sections of its own citizenry. Had Mussolini survived the war, I believe that there is little doubt that he would of stood trial for warcrimes.

Next up are the Brixa 45mm Mortars. each Italian infantry battalion in CD is meant to have two stands of these. While other nations have 81mm mortar platoons organic to their battalions, the Italians have something somewhat less useful.

Metal Figures - I think by FAA. One stand is in the firing position, one stand showing the mortar on the move. The only game difference is aesthetic.

And the other side of each stand.

And the figures for four more stands.
Each infantry battion is also meant to have two MMG stands. Currently, I only have the four Breda M1937s from the Waterloo 1815 Folgore Division Light Artillery set, which have a gunner cast with the figure, and has the gunner in the paratrooper helmet. I plan to get hold of a few sets of the Waterloo 1815 Italian Infantry Support Group to acquire some more, but in the meantime I will make an attempt to scratch bulid a couple.
1/35 weapons often provide useful fiddly bits for scratch building.

And yet again a Bren may save the day.
As work progresses on these, I will post the results. I also will attempt to make some other infantry support weapons such as the various models of  Fiat-Revelli MMGs.

Of course I will need to provide my Italians with some anti aircraft defenses, so I glued onto a coaster mdf base a resin model of a Skoda7.5cm kanon PL vz.37, which was known in Italian service as the Cannone da 75/49, or even as the Cannone da 75/50 I have had this model for quite a few years, and as a result have no idea of its manufacturer.
Basing it will protect the fragile resin parts.

Enough room is on the base for the gun crew stand to placed right next to the gun.
Waterloo 1815 47mm Antitank gun. I need to make up multiple gun crews for these.

The only painted Italians I have at the moment are Esci Alpini that I acquired second hand based for WRG  and rebased for Cd. The uniform colour is a little too green for my liking, and the use of green for ammunition pouches - my understanding is that they were brown leather, black, grey, or grey/green. Still they did the job against Mr K.!

Command Infantry and Command stand. Nice Alpini figures with their black crow's feather.

Infantry stands. The LMG figures don't add an additional factor to the stand.

Pack mule stand. Every Italian infantry battalion has one pack mule stand in it's TOE.

The rest of the painted figures. Many of these were converted to normal infantry by having the Alpini feather trimmed off their helmets.
Unpainted Esci and Airfix Italians.

Unpainted Waterloo 1815 Italians.
Hopefully, I will be able to mix and match figure sets to build up some reasonable Italians for use in Spain, North Africa, Italy, and even the Eastern Front. The next post I do should be an AAR on last weekends Harad game.

Battle for St. Dominos Pt. 2.

The last post had my brave Italians withdrawing further into the woods after giving two of  Mr K.'s infantry companies a bloody nose. After their initial success, I felt it prudent to withdraw them before they received the attention of the US Heavy Weapons Company, or were outflanked by Mr. K's advancing infantry.
Outnumbered four to one, the brave platoon fell.
Visibility in the woods is 2".  Can't see the Italians? or the US? because them all look the same? Welcome to Mr K.'s world.... (Italians are group towards bottom left, the rest are US troops.)

This was where the US managed to gain their first success by catching the rearmost of the withdrawing Italian platoons and wiping it out. Its brave sacrifice allowed the rest of the company, and the battalion commander, to escape. The next turn saw the Americans advance further into the woods, while my brave Italian infantry moved out of the woods. closely followed by the US infantry. a brief firefight ensued, with the US getting the better end of it due to their superior firepower (the weapons platoons), and the support of the battalion mortar. the exchange was not all one sided though.

US Troops are bounced back into the woods from whence they came...

IWhile the italian troops take hits, and then would fail their morale...
And then came the Axis reinforcements! A full company of German Recon Armoured Cars - who as they are a different force will need to make all new spotting rolls for the US Infantry as they hide in the edge of the woods.
But I ordered Panthers......
Axis Reinforcements - Troop Quality: Veteran,  Morale: 10.
 German Scout Car Company w/
  1 Command  SdKfz 234/1
  2 Command  SdKfz 234/3
  1 Recon  SdKfz 234/1
  2 Recon  SdKfz 234/2s

The arrival of the Axis reinforcements allows Mr K. to dice for his reinforcements, and he rolls a 2. His reinforcements will arrive soon. In the meantime, I start to move my armoured force to deal with the Americans in the woods, and to protect the right flank of the monastery from an American advance in that direction. At this point I wishing for some more infantry and move my support stands into firing positions in a desperate attempt to increase the weight of fire from the monastery. In CD, if a Support stand is lost, a battalion gains a permanent -1 morale modifier, but with the Americans advancing I need the extra fire power.

The garrison awaits the onslaught of the US advance.
Fortunately more good news occurred when the company that had failed it's morale last turn decided to get back into the fight. They could only pass their morale on a 2 or less, so I was resigned to see them fail yet again, - perhaps even disastrously so - but they pleasantly surprised me.

A two Sir? Well ok!
This was to prove fortunate, as with the arrival of the US reinforcements, Mr K. was to become emboldened in his attempts to force a decision. After all, he now had a company of tanks to support his attack.

Shermans.... Where are my Panthers?!
US Reinforcements - Troop Quality: Experienced,  Morale: 8.
  Medium Tank Company w/
  1 Command  M4 (75)
  1 M4 (75)
  1 M4 (76)

The next US attempt to assault the monastery was made as his armour arrived on the table, and was a brutal attack by a full company of infantry, supported by his mortar platoon, on the flank of the monastery defended by the Italian infantry company that had been reinforced by the two support stands. Of course his attack had to cross open ground, which allowed the armoured cars to give supporting fire to the garrison.

Mr K.'s shame - His US troops were demoralised in their first encounter with Italians...

 The resulting encounter hurt me, but also resulted in the US company failing back, and failing its morale becoming demoralised. Of course soon the US armour was going to have a crack at things....

Shermans. Not a problem easily solved by my force.
The only good thing about their appearance near the monastery is that it allowed me to roll for further reinforcements, which would arrive in the next two turns. However, I had to survive the next two turns. This was going to be difficult.

The armoured cars get the worse of an exchange with the Shermans.
The armoured cars were able to hit the Shermans, but couldn't hurt them due to the range, their presence however made MR K. concentrate his efforts on dealing to them, rather than do further harm to the garrison, as he couldn't risk bringing his Shermans closer, nor risk sending infantry without the Shermans. The distance was also worked against him, as while he could destroy the armoured cars with his tanks, he first had to hit them - and the dice were against him that day.

The beleaguered garrison of St Dominos..
This was the point at which we decided to call it a day, as we had approached the end of our day of gaming. both of us were very happy with the way our ad hoc reinforcement mechanism had worked to gradually feed in additional troops into the battle, and both of us were impressed with how well the Italian infantry had performed - especially the plucky little company that just would not die!  as a result, I will be painting up some additional Italian forces for future games against Mr K. The game was judged a draw, with a tip of the hat towards the Axis, as we had reinforcements to come on table - (either a company of Panthers - which would have allowed US air support, or a company of Panzer Grenadiers in Halftracks) that could have tilted the game towards me more than Mr K. could cope with - I mean look at the trouble his boys were having with mere Italians...