Wednesday 15 October 2014

Loot from Kapiti

Last weekend I took the opportunity to go to the Kapiti Wargaming Club Annual Bring and Buy (click here for details), and met some very nice people. Everyone I spoke to was friendly and very helpful. So I thoroughly recommend attending any of their events if you get the opportunity!

All in a purpose designed cardboard box too!


I also took the opportunity to acquire a rather nice piece of terrain - a pre-painted set of resin dungeon building pieces that can be used for a variety of purposes other than making mazes, but are pretty damn cool!

All the pieces minus the connectors were there.


Naturally, upon return to Palmerston North, I had to get it out and play with it and see how it all connected together.

A large chunk of it laid out together
 The set comes with a booklet of sample layouts that look interesting, but are more geared towards dungeon delving RPGs than for wargaming scenarios. That being said, I do have a couple of ideas on how to employ this rather nice set of terrain.


Top left, one of the two polystyrene trays the pieces go in.

Close up of the pieces.
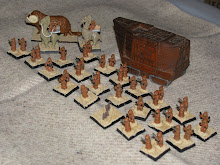
 I also purchased a number of GW Night Goblins that I plan to use as part of my 20mm Fantasy project. This does feed into one of the ideas I have on using this terrain.


And a resin gun emplacement too.
I also picked up a very nice resin gun emplacement with cast on wicker gabion detailing. It had been designed for use with 25/28mm figures judging from the barrels, but once they are removed and a few other tweaks occur, it should be a very nice 20mm piece for use in 18th century games.


Close up of the emplacement. I have plans for this piece...
Last week also saw the arrival of  some purchases I made over the internet. I bought some 1/144 scale Mig 21s and two packets of the Ultima Ratio Mujahidins (Click here for the PSR review)

Loot unpacked.

Bag inside the box - Three sprues per box.
So I have more stuff to paint, and hopefully I can organise a game of something soon and post an AAR!


Monday 6 October 2014

Diecast Chieftains

While I have acquired a number of the Matchbox Battle King Chieftains to use in modern games, I have never, until recently, obtained an example of the Playart Chieftain. Playart produced a range of diecast tanks at around the same time Matchbox produced the Battle King range.

Playart Chieftain Tank.
Unlike the Battle Kings Chieftain, the Playart version has a more realistic set of running gear. It does seem to have a turret that seems a little odd, as are some of the angles to the rear of the hull.

And painted up, with figure for scale.
In order for it to match the other Chieftains I have, I decided to give it a repaint using the same techniques I have used on other vehicles - sand coloured paint, followed by a brown wash.


Front view.  This gives a good view of the turret shape around the gun mount.
A side view. Note the length of the gun barrel.

Diecast Chieftains. The metallic green paint has survived rather well on the two Battle Kings.

I also have two Battle King Chieftains to give the same treatment too, of course the large horde of plastic Chieftains (click here for details) that I still have to work on.

Sunday 5 October 2014

New Tracks From Old Strapping

Many of the Battlekings that I have  acquired over the last six months have been missing their tracks, so I have started experimenting with a technique I have used with other kits of using plastic strapping (such as is used to strap up cardboard boxes) to make new tracks.


A selection of tools and materials used to track the toy tank.

I have improved on the normal method I used of just putting a band of strapping around the running gear by cutting small bits of strapping and gluing it around the curvature of the tracks at front and rear.

Despite losing the commander's head and both tracks, the original paintwork is disturbingly intact.


Strapping goes round running gear, small bits placed at curvature of track to create illusion of more detailed tracks.
 Ideally the small bits created should be uniform in size. I used the THAR  (That Looks About Right) method to achieve this.


Toy tank and lens cap
The next step is to decide on a suitable head to place on the tank commander body, and then paint the tank up.

More tanks.

Other tanks acquired recently have included two of the tanks from Hornby's military train set, and a Playart diecast Chieftain tank. (More on this to  follow  later)


Hornby Tank and Matchbox Chieftain
The Hornby tanks are quite interesting as they seem to based on an impression of what features a modern tank should have, rather than on an actual vehicle. Given that I plan on using them in imagination moderns games, this allows me to give them stats that not overbalance play as they will be used to represent a tank that has been produced by a commercial interest to be marketed towards the lower end of the market.

Side view and bottom view.
They will require a bit of work as the running gear appears to be modeled backwards, and the wheels on the bottom prevent the tracks from sitting on the ground.