Thursday, 30 May 2013

Vulcan!

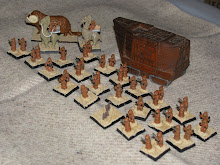
The Vulcan bomber has always interested me greatly, and since I am gearing up to run a few Falklands games, I figured the time was right to purchase one - especially since there was a very nice diecast one sitting at one of the local model shops.

I purchased this Adult Collectible from Play Concepts....
 On a more serious note, the staff at Play Concepts are very friendly and helpful and their prices are very good - I have been picking up 1/144 Academy kits for around NZ$6 - NZ$8 a kit! Needless to say, I will be going back as they are very local to me, have great prices, and are very friendly.

Blurry photos are a house specialty!
The die cast is a very hefty model of the Arvo Vulcan Bomber that was to have been the primary for the first Black Buck raid on the Falklands. (For more information on the Vulcan click here, and more information on the Black Buck raids, click here)

A  not-quite-final layer before I got my mitts on the Vulcan!

Under the box lid there still remained a protective plastic cover separating me from my Vulcan! Fortunately, I had the wit and means to deal with this obstacle. Of course under the plastic cover, a sheet of plastic was layered over the model to protect the paintwork.


One last layer!


RAF Vulcans visited New Zealand several times in the 1950s,'60s, and '70s. Footage of the 1956 visit can be seen here. My Father saw one of the Vulcans flying around NZ while he worked as a linesman for the New Zealand Post Office. He was up a telephone pole at the time and said that he got a very good view of the aircraft from up the pole!

One visiting Vulcan had its RAF roundrel replaced with the RNZAF roundrel - which looks rather good on it! More details can be found here, and more pictures can be found here.


Even a 1/144 scale 'Tin Triangle' is quite large!

And it is quite heavy, but then there is a lot of  model aircraft  here!

I thought that I should also do some comparision shots with one of the Pucaras. As you can see, the Vulcan is much bigger!

Two rather different bombers!

The Vulcan is massive!
For those interested, South Atlantic War gives the CA stats for the Vulcan as Punishment 7, Ordnance 21 and a SAM mod. of -1. If only one aircraft is used - such as was historically during the Black Buck raids -, ordnance drops to 5. So even a single Vulcan can ruin your day in CD! Still, better than being on the wrong end of a tactical nuke!

Tuesday, 28 May 2013

1/144 Shapeway Pucaras

As part of the building up of figures and models needed to run the Goose Green scenario given in both the old CD CPs, and in the Harpoon supplement 'South Atlantic War', I acquired some 1/144 scale Pucaras from Shapeways (More details are given in an earlier post here)


The canopies are glued into place after been cut off the runners.

On the weekend I converted them to being 'in flight' rather than the wheels down version they where supplied as. Once I removed the undercarriage, I then used GW Liquid Green Stuff to bog the resulting gaps. I hadn't used liquid green stuff before, but after this I am very impressed with its performance, and can see myself using it a great deal.

Brushing in the Green Stuff was the easiest bogging job I have ever done!

I decided to give both aircraft the same style of paint scheme, and that I would do one similar to that found on an aircraft from III Brigada Aerea. Apart from the usual Googling for pictures, I also dragged out my copy of the Airplane magazine that featured the Pucara. The article was very interesting, particularly over the claim that Iraq had looked at purchasing some in 1985.


And two Pucaras are now  ready for the table!
 The paint job is very simple and basic, and I don't currently have any transfers for them, but I believe they are now table worthy!

Side view.

The underside of both are painted grey.

All I need now is some ground troops for them to support!

So all that is needed now is to paint up the Argentinian ground forces, and for the 1/144 Corgi  Diecast GR3s to arrive .


Sunday, 19 May 2013

Of Scouring pads and a good (brown) wash!

Mr K.  is working on getting a CD game up and going.  He came around on Saturday to do some terrain building and get some of his troops washed. Like myself, Mr K.likes making terrain on the cheap.


Mr K arrived with a great deal of green scouring pads.


And cut into strips.

Each strip is three pads thick.

A US infantry stand of Revell figures for scale.


Strips are packed up to await the next step in construction.

 No prizes for guessing where Mr K.'s game will be set! Mr K. also brought over about a regiments worth of   command, infantry, and support stands to start giving a wash and some repairs to.

The figures are a mix of US Army and Marines from Matchbox, Airfix, Esci, and Revell.

Before the wash - these guys are some of Steve's former troopers and have seen quite a bit of hard play.


Group shot post wash.

And again....

and once more for luck!


Some progress was made on these while i worked on some 1/144 scale Aircraft with the Dremel. Mr K. will no doubt be part of this week doing more work on his CD Americans, while I am continuing to flit from project to project!

Wednesday, 15 May 2013

Airfix British Infantry

The great refurbishment project continues, with a small selection of the Airfix British Infantry (click here for PSR review). I only have a small selection of painted figures from the set - fortunately I do have a much larger selection of the unpainted figures - but since they still retained their paint jobs, I figured I would touch them up, wash them, base them, varnish them, and then post them!

Almost a Battalion's worth!
I have based them up as a 1943 CD3 British infantry battalion - sans the supporting stands and vehicles and a missing infantry stand in D company. Since there wasn't a suitable painted figure to act as the battalion command stand - and the officer figure from the set is more a figure to put on a command infantry stand - I decided to paint up one of the figures from the Matchbox British Infantry set. I also painted up a hard plastic Airfix gunner to put onto a stand with the orphan painted Airfix gunner that I acquired at the same time as the infantry. I painted these two additional figures using Vallejo English Uniform as I didn't want to try and match the original painters uniform colour with a complete figure as I didn't think I could get a close enough match to make it look right.

A patrol stand and two stands suitable for use as FOs or Staff Radio stands.

Each Rifle Company is meant to consist of one command infantry stand, and two infantry stands.I decided to use the same figure combinations (out of a very limited pool of painted figures) to create the stands for each company.

A Company. The command infantry stand is the stand on the right. The two stands with Bren guns are infantry stands.


B Company. same poses, different figures, different angle. 
The figures had been painted - much like the other sets by this painter - with enamel paint, that after a number of years of poor storage had begun to crack and flake, but after a few touch ups and a brown wash come up quite nicely.

C an D Companies. D is lacking an important element.
I didn't have enough painted figures available to make up a command infantry stand for D company, so when I start painting up the support elements for this battalion, I will paint up an additional command infantry stand.

The replacement Battalion command stand, and the gun crew stand for the Six Pdr.

I did paint up a battalion command stand, as having one makes the unit a great deal more playable, plus it gives me an excuse to paint up an officer from the Matchbox British Infantry set. I have always liked the figure, and should I paint up some RAF types I might just add one of these painted in blue into the mix.

Tuesday, 14 May 2013

More tanks from the Wife.

A couple of weeks ago I mentioned in passing to Katherine that I had seen some useful looking Matchbox Battle Kings for sale on a local auction website. So being the nice, supportive and lovely wife that she is - she went and purchased them for me!

Wrap these in bubble wrap, then in the cardboard shown - and that was the way these were carefully packaged!

A rather dirty and dusty K-107 155mm SPG.


 Today they arrived in the mail, in all their dirty and play worn glory. Two of them are types that I am already happily using for my Haradi forces - The K-107 155mm SPG (which I went into great detail here), and the K-102 M48A2 Tank (which I haven't mentioned in the blog yet).

A K-102 from the first run of Battle Kings - and the commander still has his head!
 The other two toys consisted of a K-117 SP "Hawk" Launcher, which despite missing one of it's three missiles was still able to launch them - much to Katherine's delight as she shot one at me!  I believe that it is a rather large box scale M727  Hawk Launcher.( a picture of one on display in Israel is here)

The diecast toy is huge, but the hatch on the cover looks about  right....
Clearly, either more research, fudging, or creative license is required before I can start to field this plane killing beast......

Speaking of beasts, the final battle king is this K-104 King Tiger, which nicely scales out at around 1/76 scale. I am considering repainting it and adding it into the box of not to be fielded King Tigers, or putting it into a batch of surplus Battle Kings and Super Kings and selling it on a local auction site.  Should I choose to dispose of it, I would consider items in trade......

Unfortunately, the commander on this one has lost his head!
By the time I post this, I will have already cleaned these tanks off, and will be preparing the M48, and the 155mm SPG for an undercoat of grey spray primer - should tomorrow bring good weather and no call outs!

Saturday, 11 May 2013

WIP: Volley and Bayonet BUA

On Thursday night I had the pleasure of playing a game of ACW V&B that had been organized by Robin - from over at Wargamingnz - and his friend Adrian. I got to use some of Robin's very nice 15mm Union forces, and get drubbed by Adrian using Robin's equally nice 15mm Confederate forces. It was a very enjoyable and fun game which I learnt a great deal about the finer points of V&B. I also saw the way Robin had made some of his BUAs for B&V - and I was very impressed - so impressed that I decided to steal the idea!

Brand New V&B supplement - 20 years old and still has the new book smell.

Earlier this week I also had my order from Old Glory Miniatures arrive. They still have in stock a number of  issues of  the 'Command Post Quarterly" and quite a good range of the various supplements for V&B. Their shipping system to non US destinations is to charge a flat US$50 rate at the point of sale, and then charge, or refund, the difference between the flat rate and the actual rate. It is an interesting system, which does have the merit of eventually charging the actual cost of shipping. The downside is that after making the sale, they are not proactive in giving out information compared to other companies - I had to email them after two weeks to find out if the package had been mailed, had a tracking number, and to find out if the refund on my credit card was just for shipping, or that one of the CPQs that I had ordered was out of stock (which would be reasonable given that they have been out of print for around 20 years now) On the upside, the books were in perfect condition, were well packaged in a sturdy box, and arrived within a reasonable time frame. I will most likely buy from them again as despite not being proactive in communications they did answer my queries quickly and promptly.

What impressed me about Robin's ACW terrain was that it was designed to have a removable section that once removed allowed the placement of  a 3" by 3" Brigade stand - the maximum capacity for a single BUA under the rules.

A log cabin and a schoolhouse.

Now I had some small period cardstock buildings - from the back of Billy V packets of 1/72 scale figures- plus a small number of BUM old west buildings, that I could use to make my own BUA with detachable buildings.

Lewis and Clark's wooden house makes a functional storage building.

The 3" by 3" gap was made by carving and gouging out a space in the upper part of two glued together scrap 3mm MDF   board pieces.

The Saloon (sans roof) and the hotel are glued onto the removable section.

Katherine came up with the idea of using two buildings back to back. I think it looks much better than using a single building.

So I just have to paint and wash the BUM buildings, and then flock the BUA and I will have finished my first purpose made V&B BUA! I have already planned out the next two - one will use the cardstock  school house and the BUM church/chapel, while the other one will make use of the BUM railway office and some spare track and some other HO bits.

Friday, 3 May 2013

Matchbox British and ANZAC infantry

 
1944 British Infantry Battalion
 As I continue the refurbishment project, I decided to see if I could use the same techniques to bring some units I had gotten off Steve H. back up and running. Steve very generously gave me his WW2 CD armies as he had decided he just wasn't interested in 20mm WW2 any more. Steve's head having been turned by the nice shiney  15mm stuff produced by Battlefront. (N.B. see this link to urban Dictionary, definition three, for my use of shiney)

These figures all had flock similar to that on the left.  I, for one, am glad of the vast range of flocks and tellus we enjoy today.

These armies included some that Steve had based up for CD 1! So this is why their base sizes are somewhat lacking in depth - CD 1 used a stand size  that wasn't as deep and was 1/8 of an inch wider. I am not sure that I will rebase them up to current CD standards - but I may yet do so! These earlier forces are also flocked with a very green flock. When I put the wash on these figures I was hoping it would tone the flock down somewhat.

The Battalion commander is the officer figure from the ANZAC  Infantry set.

The figures used are a combination of the Matchbox British Infantry (PSR link here), and the Matchbox Anzac Infantry (PSR link here) sets. They have been organised as a 1944 British Infantry Battalion, sans the mortar stand and all the vehicles, as per the TOE given in CD 1.


The stand with the two rifle men is the battalion's engineers, while the two  kneeling stands are meant to be the gun crews for the 6pdrs.  I shall probably treat them as an attached infantry company as none of them really look right for their stated role.

The CD 1 TOE gives an additional 6pdr antitank battery, and gives each rifle company a heavy truck to transport the unit. The AotSWW TOE strips the second 6pdr battery and organic company transport, and separates the CD 1 HQ company into a Headquarters company and a Support Company.

A Company - the command infantry stand is the one with the kneeling riflemen.

Fortunately, the organization of the rifle companies stayed the same, with each one consisting of one command infantry stand and two infantry stands.

B Company - the command infantry stand is the one with the Sten and the Bren.


C Company - the command infantry stand is the one with the two  Thompson Gunners. neither is named Roland.

The two sets work quite well together, although to my mind the Lee Enfields of the British infantry set seem to have a little more heft to them, however this is more than made up for by the sword bayonets of the ANZAC set.

D Company - the command Infantry stand is the one on the  right side of the picture.
Right, back to the workbench to do some more work on my shineys before the school holidays come to a close and I have to do some work again.


Thursday, 2 May 2013

Airfix Australian Infantry.

Since the AWI figures I refurbished turned out so well, I decided that I could do the same with some of the other figures that I acquired from the same source. As I hunted through my collection of figures, I discovered a number of figures that had been painted by the same painter that I could turn into CD3 units. I also found a number of painted figures from other sources - such as a huge number of  CD units and loose figures that I had been given by Steve H. - to name one such deposit of figures.


The complete batch of refurbished Airfix Australians

So I decided that in order to rapidly expand my pool of available wargaming forces,I would begin the process of refurnishing these figures. First up are some Airfix Australian Infantry (link to PSR here). All I did with these figures was to touch up the paint work, give them a brown wash and then base them up as an under strength CD3 Infantry battalion with some attached elements.

Machete waving Battalion Command stand and two stands suitable for use as attached staff radio, FO, or even FAC stands.Given the brigade only has one staff radio stand - and it's a radio truck - these stands probably won't remain at the battalion level for long. 

No battalion mortar stands - but here are a couple of porter stands with a nice  stand of marching infantry.

 The paint scheme used by the original painter is similar to that on used on the box art. It's quite a nice scheme and the brown wash tones the green down nicely. Fortunately my camera's flash brightens it right back up!

No recon carrier either! How about a recon stand and two patrol stands instead? 
 I've always liked the prone Bren gunner in this set, but like most prone figures not the easiest to use with CD's basing system. I try and use the fact they require a bigger base to my advantage, so that it will symbolise  a special stand like a patrol - as in this case!

Two infantry stands - this could be an understrength infantry company.

The figures that been painted quite some time ago with enamel paint, and had been stored in a draw with a pile of other figures. as this was a rather suboptimal way of storing the figures,  there was surprisingly little paint flaking. Given that they had been stored badly by me since 1996, this is pretty amazing!


The kneeling Bren gunner is also a great pose - it got used in the 1/32 set and has been widely knocked off. 

Interestingly enough the original painter chose not to paint up the full set of figures, or some had been lost before coming into my hands (or even after coming into my hands!) as only 33 of the 48 figures in the packet were available for me to refurbish.

The rifle swinging pose is not quite as useful . Another two infantry stands. I have been considering using the stands  that have the figure that is throwing the grenade as command infantry stands. Doing this would allow me to field four weak companies (per the 1943 TOE)

Two more infantry stands, giving a total of  nine. stands, or three full strength rifle companies.  Useful as the 1941/42 TOE has only three Rifle companies to the battalion. 

I did add two figures that I had first painted back in 1991 into this batch of refurbishment, as I wanted to create a stand of wounded troops. The figures used were one of the sitting wounded figures from the Airfix Australians, and the standing wounded figure from the Matchbox ANZAC set. (PSR link here)  Rather than try and reproduce the paint scheme of the original painter, I opted to just try and produce a stand that work work with the others.

Wounded figures. I have more of the sitting Airfix wounded figure to paint up.

Once I have refurnished all of the suitable figures, I will start painting up stuff needed to fill in the TOE gaps of the recycled and refurbished units. Work will also continue on the Pucaras and the 1/1800 scale navy. Plus I might even do some gaming!