Friday 30 March 2012

New Additions to Harad - 155mm SPGs.

As part of my latest purchase from Glenn, I acquired some more Airfix Attack Force ready made vehicles. I increased the tank holdings by one M-48, and by one Centurion. The M-48 will join its brethern in the standard Haradi paint scheme, but I might paint up the Centurion in the other paint scheme of base green, with sponged on redbrown, and mud brown. I still haven't decided, as I am not that impressed with my alternate paint scheme.
The recent purchase includes a few 155SPGs.

Airfix M-48 shown with  1/72 Italeri US Vietnam War Infantryman,

Ah, the Centurion!  Frank's Noddist Horde has yet to face these in battle!

Airfix Attack Force 155m SPG. This one was acquired with a name inscribed. I may make that a feature of the finished vehicle.
The Attack Force SPGs seem to be very basic models of the late WW2 US M-40 155mm SPG. The major flaws are of course no spades, and the gun is a little on the small side. That being said, they are perfect for my purposes.
Quantity has a quality all of its own.

My plan is to convert a number into munitions carriers, and crew transports, for the F3 155mm SPGs, that I have already painted. This will be achieved by removing the gun and giving the vehicle a canvas top. I am planning on replacing the armament on a few more, and have already started experimenting.
The brown gun is from an artillery piece found in a packet of 54mm toy soldiers.

And the view from the rear.
While still looking quite basic, the new gun is somewhat more solid in appearance and to my mind somewhat more pleasing to the eye. Other suggestions I have been given include converting the vehicles into ambulances, command centers, troop transporters, and recovery vehicles. These vehicles present quite a nice opportunity foer making a number of basic conversions.

Thursday 29 March 2012

Something for Gowan.

A very quick post tonight inspired by Gowan's comment on my last post. Caesar's set of Modern Urban Resisters contains a figure that some feel has a passing resemblance to the recently deceased Osama bin Laden, and of course Micro Machines has produced lots of different Darth Vader figures in various dramatic poses. So I was able to combine two figures as a size comparison for Gowan.
Micro Machines Darth Vader and Caesar Miniatures Urban Resister.

A Stormtrooper added to give a better size comparison.
Gowan, I hope this gives you a better idea about how compatible figures from the two manufacturers could be. Regular service will resume shortly.

Wednesday 28 March 2012

Y-Wings.

Recently I acquired some more more bits and pieces from Glenn. This included some Airfix Attack Force 155mm SPGs, and some NATO Infantry, but it also included three Micro Machines Action Fleet Y-Wings. The Y-Wings are a very useful addition to my Star Wars forces, and like much of the Action Fleet range is actually better scaled to the 20mm Micro Machines figures, than the 25mm Action Fleet figures. Wookieepedia gives further information on Y-Wings in the Star Wars universe here, and over on  RPG.net is an interesting discussion on deploying Y-Wings in  dispersed forward operating bases, akin to the way Harriers can be deployed.
Y-wings atop the Chest freezer. Each crew consists of a Pilot, Gunner, and an Astro-Mech Droid. figures are all Micro Machines.

On each Y-Wing model, the left engine can be pulled out and exposed.


The view from above. I suspect that in true 1/72 scale the Y-Wing should be much bigger.

The Astro-Mech Droid in its natural environment.

The empty Droid slot.

The cockpit was designed to take one Action Fleet figure. Given that the Y-Wing is a two seater, it shows how small it is for use with the 25mm Action Fleet figures. However, it was designed as a toy, so it's quite understandable.

The landing skids are retractable.

Rear view of Y-Wing, and rare view of a fallen Droid
All in all, these Y-Wing are  very nice, and are quite useable with my Rebel Pilot figures. Many thanks to Glenn for being the source of some nice pieces of kit!

Monday 26 March 2012

Both Bits Together.

So I took these photos to see how both pieces would look next to each other. Naturally the Monastery needed to be placed at a higher elevation.
The most logical placement.

A view further back.
 After taking these photos, I think I need to make up some hills, paint both massive terrain items up, and seriously start thinking about running a Cassino game. Of course, even if I just paint up both pieces, I will count that as a plus.
Closer in to the ruins.
Both of these pieces are now back in production. Scenic Effects was bought by Monday Knight Productions in 2006, and they list both items here. They also have some other very nice pieces, which i won't even think about until I give these two their long overdue paint job..

Ruined Mediterranean Village - A Large Terrain Piece.

At the same time I purchased the ruined monastery terrain piece, I also purchased another large Scenic Effects item. This also was purchased sight unseen, but like the monastery I was (and remain) very impressed with it. In CD terms the ruins are much closer in size to being a town than a village, so I have always thought of it as having a certain Cassino quality to it.
A view from above. Spot the 20mm figure near the centre of the terrain.

Another view from above. This is a large ruin template.

View from the side.

Another view.

Could this be part of Route 6?
lots of detail in the built up elevations.

A nice little feature.

One of the corners.

A closer look.

Moving down the main street.

A ruined statue in the plaza.
Like the monastery, the ruined town is made of resin covered expanded foam. I think that this year I should paint both pieces up and game with them. It will give me the motivation to finish redoing my WW2 Germans, and to build up a useful force of British, Indians and Kiwis - and Poles, I won't forget about the Poles.

More Terrain Pieces.

Around 14 odd years ago, I purchased a couple of large terrain pieces produced by an outfit called Scenic Effects. The first of these terrain pieces was to represent a certain Italian Monastery of the Benedictine persuasion. I based my order on glowing telephone descriptions from the vendor, and a hazy small black and white photocopy of a picture from a catalogue. So sight unseen, I placed my order and waited for a large package to arrive from Australia.
Spot the 1/72 scale figure in this picture.

Quite bombed out, but still very roomy.
 While quite a huge piece of terrain, it is extremely light. This is due to it being made out of expanded foam. I have been storing it for quite some time, and have been tempted to onsell it on more than one occasion, but I think that I might actually paint it up and use it in a game. Possibly a WW2 Italian front game? - Maybe 1944 on the Gustav line?
Another view. Spot the 20mm Grunt.

And another view. This thing is massive.

Comes complete with trenches.

Another view.
And yet another view!


 It has lots of detail which would be picked out nicely by a good wash! I can see this taking an entire weekend to finish, but I should paint it up and use it before it gets much older!

Sunday 25 March 2012

The Paper Cave - A gold mine of resources!

 On Saturday I went to see Warren, owner of the Paper Cave, to collect some books. The Paper Cave is well named, as it is warehouse fill of books, magazines, and comics, ranging from the 1960s through to the 1980s. Actually, it even has holdings dating back further, but the main holdings of the collection fall in these decades. Of particular value to anyone with an interest in military history is the vast amounts of paperback editions of biographies, popular histories, and academic histories that Warren has. Now, this post is going to be a shameless plug of the Paper Cave - but since in Christchurch most of our decent second hand book stores have closed down, making getting your hands on books even more difficult -I figured a shameless plug would be worth while. Naturally, I am adding the standard disclaimer that I have no financial or other interest in Warren's business - just that I am a chronic bibliophile....

Lots of NZ Heritage - A great start for any NZ related project.
One of the issues covering WW2.
The Crete issue.
The covers feature work by a variety of NZ War artists.
My own purchases: Lord Russell of Liverpool's books dealing with Japanese and German war crimes in WW2.
A history of Imperial Japanese air power from 1937 to 1945,  and Caesar's 'Conquest of Gaul'.

Colour plate from a wartime magazine.

Princess Elizabeth.
Warren also frames colour plates, and advertisements, from various magazines. These look fantastic, and can range from Airfix ads through to Varga girls. Warren is a gold mine of information on publications in New Zealand, and is extremely helpful in helping you track down issues of out of print work, be it paperback editions of Japanese memoirs, or just copies of the humble war comic.
Banana boxes of humble war comics.
 Warren is contactable on 03 942 1127. He's a thoroughly nice guy, and if you are hunting for something in particular - he is well worth a call.

A Trench Too Far Pt. 1

About ten years ago I ran a large WW1 game called a 'Trench too Far'. the game was set on the western front in around 1917 and had around 3-4 players a side. The venue was the University of Canterbury Students' Association's boardroom, which had a huge boardroom table which was perfect for running large games on. Of course a big WW1 game needs lots of trenches. So I had to figure out a simple way of building trenches that would be easy to make, easy to store, easy to transport, and able to be reconfigured for other games. Fortunately, my good friend Adrian had previously made some trenches based on the instructions in the GDW Book 'The Soldier's Companion' - which is the miniatures rules system  for Space 1889. Naturally, I adapted this idea, and Adrian's well crafted trenches, into something that could be mass produced by undergraduates.
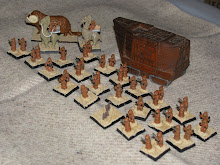
The trench box, with 20mm Italeri  (Esci reissue) US Vietnam War Infantryman for scale.
The lid is removed.
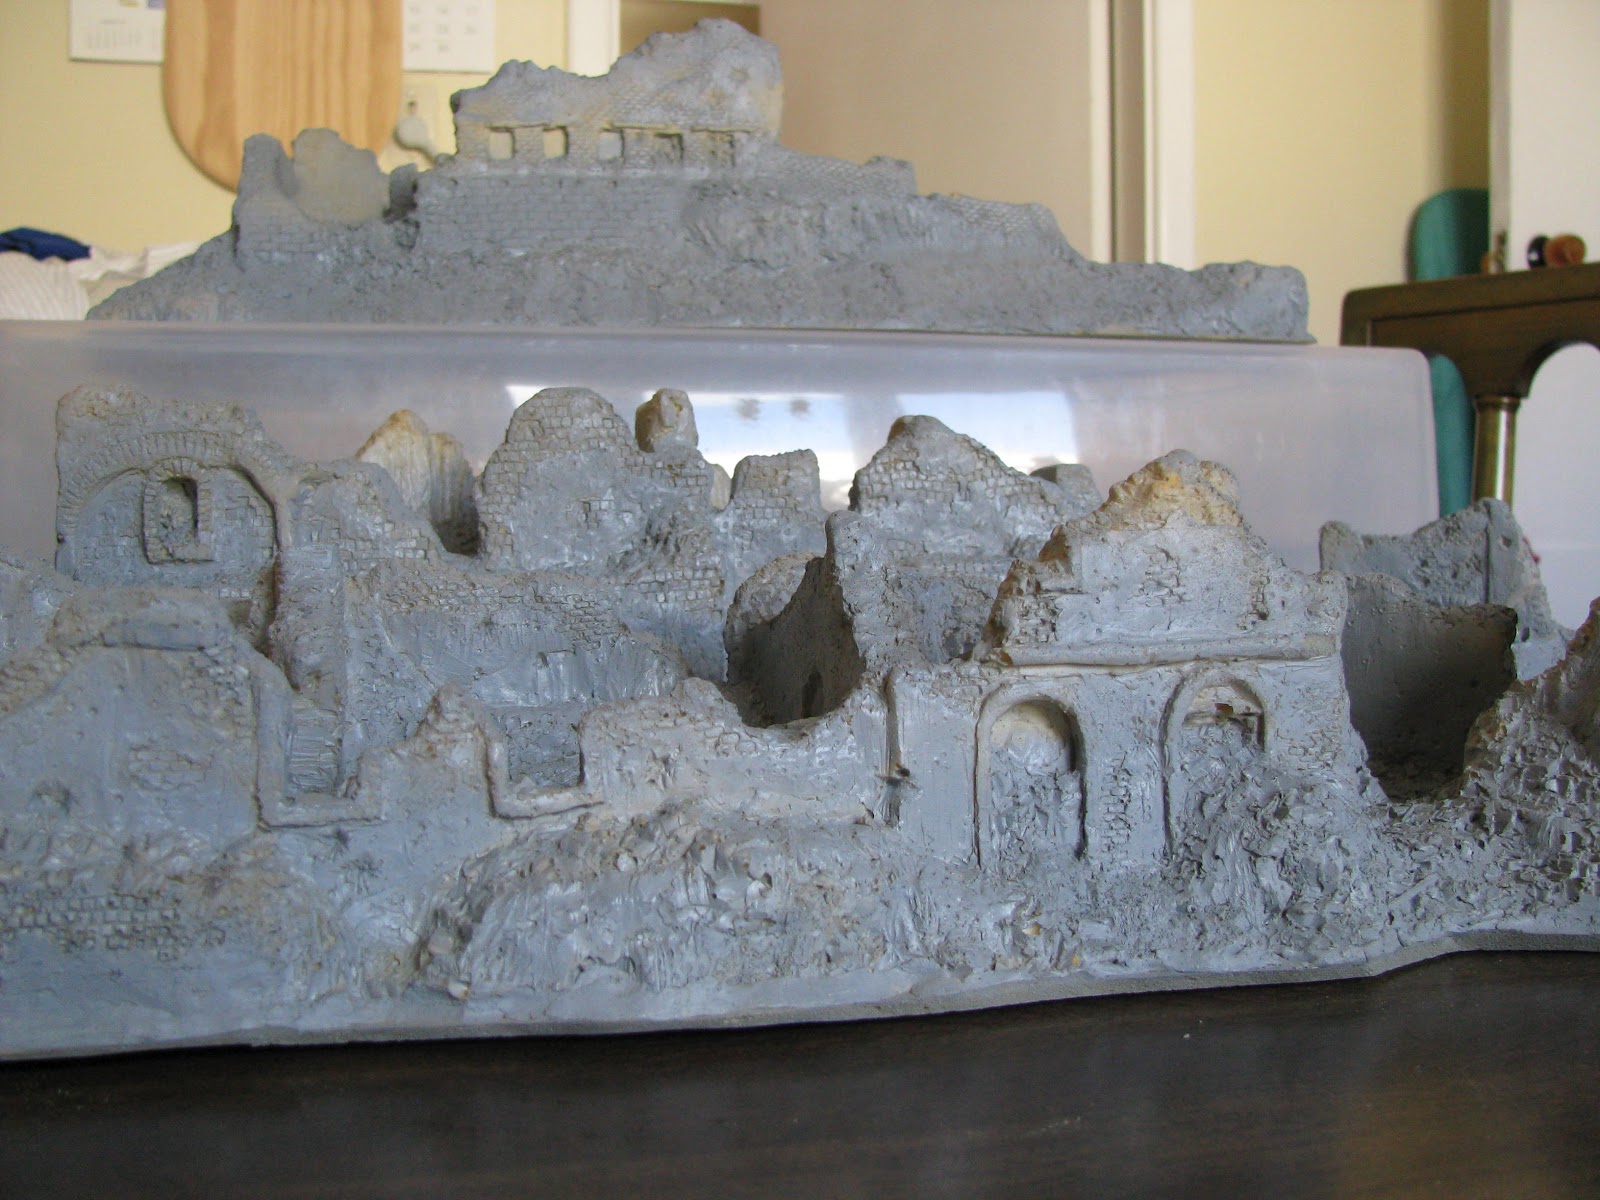
Standard trench section.

Cross section view.
 Essentially, the basic design was to make a standard footprint of cardboard, run two sections of 20mm high cardboard, 22-25mm apart, down the middle of the section, and put foam, plaster,or other material, on either side to build up the trench sides. While a wider trench footprint would have allowed for a much gentler slope and looked much better, storing and moving them would have been a hassle. A larger footprint would have been more difficult to deploy on the tabletop in large numbers. given these factors, and the need to churn them out in numbers, compromises in realism were made to increase playability.
Angled sections created kinks and zags in the line.

Cross section of a late production trench.
 Towards the end of the production run  angled cardboard was used to build up the trench sides.
Top of a T section, to allow communication trenches between trench lines.
The sections were sprayed before flocking, some with base back, others with base brown, with generally another coat of brown sprayed over top. My plan is to refurbish these sometime this year, by respraying and flocking, and adding in some duckboards and other bits to each trench. I might even get organised and put an inventory label on the box. I am rather fond of these trenches, and have used them as a teaching aid, when teaching Year 10s about Trench Warfare. At the same time I built up sections of barbed wire and I will put up pictures of that at some stage.