Followers

About Me

My photo
I wargame in 20mm, primarily using Command Decision 3, but have been tempted into other systems. I have a tendency to adapt CD to suit other periods with varied results! I take awful pictures and am at best an average modeller and painter, but hopefully quantity will have a quality all of its own.

Wednesday, 16 May 2012

A warm day in Bosnia: Part 2.

The sweeping vista of the bold Bosniak advance.
On the first turn I advanced my force boldly towards the Noddist hordes. My tanks engaged Frank's armour in the center and I fired all four of the lead T-55s at the Nod armour. This resulted in achieving 1 hit. I had hoped for a more satisfying results. Frank's gunnery was somewhat better with his four lead tanks achieving two hits on one of my T-55s, forcing it back and into the nearby woods.

Hiding in the woods seems like a good idea...

Frank is also using his Spandrel equipped BRDM 2 for the first time. He bloods it by taking out a light truck carrying a TOW stand.
Frank's new toy. S&S Models, BRDM 2.

Burning Bosniak light truck.

Sneaky thrust on the left flank...

Turn 2 sees a rapid advance forward by Frank's mechanised infantry on the left flank. Meanwhile, my T-34/85s advance and outpace their supporting infantry by 18" - or in scale terms half a mile! The speed of the T-34/85s advance surprises both sides as they charge unsupported into the woods!

Outpacing the infantry and charging into woods is not the best of plans...
Brewed Bosniak T-55.
Meanwhile, on the main axis of advance,  the Noddist BRDM 2 takes out a T-55, and his T-55s open up and do 3 hits destroying one of my T-55s. My tank gunnery this turn is shocking, causing no damage to his armour. The remaining T-55 platoon then pins in the morale phase - not really a surprise. The only bright spot of the turn was my brewing of Frank's recon BMP with the T-55. Overkill? - yes.

Take that, Mr BMP!

Turn 3, I manage to disengage my T-34/85s from the woods before they get close assaulted by Frank's infantry. I also manage to advance two infantry companies forward to support the T-34/85s.Both sides perform badly with tank gunnery, exchanging fire with no hits!

Where is the Bosniak infantry?

Frank's air support arrived this turn as well. At this point I start to seriously doubt my air defense... my stingers fail to hit the MiG 21, but the MiG fails to damage anything in its attack. It does generate a morale -2 penalty for any of my forces within 20" of the target. This results in one of my infantry companies becoming pinned. Not the worse possible result from air attack, but still quite disruptive.

Guess what my Stingers can't hit....

 In better news, one of my TOW stands destroyed one of the Nod T-55s! Frank then uses his BRDM mounted Spandrel  to toast one of my T-34/85s!  Frank's artillery missions fail to arrive this turn, as he doesn't have an Artillery Spotter or Forward Observer with his force -meaning his chances of getting fire when he wants it is fairly average. Frank then vows that in future missions he will always take an artillery spotter.

Brewed Nod T-55.

Brewed T-34/85. The Spandrel is very effective.

To Be Continued...

A warm day in Bosnia, 1992: Pt. 1

Last weekend frank and I played a small encounter game of CD3 set in our alternate history Bosnia. The alternate history that we use is very rough, and not well defined, as it is only used as a rough framework for staging pickup games. The background is as confusing and as fratricidal as the real world Bosnian conflict, but with the added presence of both Nod (aiding the Serbian forces) and GDI (fighting Nod and its allies).

Turn 0: Let the games begin!
Frank has made up a number of very nice Bosnian themed BUAs, and his Nod forces are loosely based around the Soviet Motor Rifle regiment organisation used in Combined Arms.


Frank's Noddists use Soviet equipment and organisation.

A vast horde of Noddists prepare for battle.
Nod Infantry and a 120mm mortar battery get ready for action.
Nod T-55s rumble into their assembly areas.

Our game had my forces, Bosnian Muslims, advancing forward to counter an advance by Frank's Serbo-Nodian horde. For either of us to win a decisive victory we had to sweep the other off the board!

Frank used the Orion Federal Russian Forces set as the basis for his Nod troops.

We had earlier agreed that Frank could use air support. I was expecting him to use a Hind, and had taken a force that I felt could deal with attack helicopters. Unfortunately, Frank's Hind is still awaiting repairs from damage it took in one of the quakes, so I would be facing fast jet instead. We also decided to use simple ammo rules, and only keep track of special rounds and anti tank missiles. We did this as we were both too lazy to write up ammo sheets. we also decided that we would both be fielding high grade, well motivated troops. Both sides would be Troop Quality: Experienced, Morale: 10.

Fast Jet air support in the form of a 1/144 scale Mig 21.
After my last game, I figured bringing some smoke would be useful!

My force was based around two ideas, firstly, that taking a force with T-34/85s and T-55s would be awesome, and that by playing a Bosnian Muslim force I could use infantry, that I have painted up for Harad, as foreign volunteers and mercenaries.

Bosniak Task Force commander sets up HQ in the BUA, while elements of the Tank Battalion, and the Mujahideen, prepare to advance.


Bosniak Forces - Troop Quality: ExperiencedMorale: 10.
  Task Force Headquarters w/
  1 Command  Stand
     Mujahideen Volunteers w/
     1 Command Stand 
     1 RPG-7 Team
     3 Infantry Stands
     1 82mm Mortar Stand (ds)
     1 Support Stand

Mujahideen Mortar stand. My sole artillery element!

     Composite Tank Battalion w/
        Headquarters Company w/
         1 Command T-62
            2 Tank Companies w/
               1 Command T-55
               1 T-55
            1 Infantry Support Tank Company w/
            1 Command T-34/85
            2 T-34/85s
The two T-55 companies.
The T-34/85 company, with the 9th Volunteer Infantry Company, with elements of the 5th VIC (on right), a Stinger team (at bottom left corner), and a light truck and TOW stand of the Anti-Tank Company on the left.
     Air Defense Company w/
          2 Stinger Teams
     Anti-tank Company w/
          2 TOW Stands
          2 Light Trucks

Foreground: The "Red Devils" of the 5th VIC prepare to advance, supported by armour and the 9th VIC.

    "Red Devils"  5th Volunteer Infantry Company
          1 Command Stand
          2 Infantry Stands
          1 Weapons Stand
          1 MMG Stand 

    "Sudanese"  7th Volunteer Infantry Company
          1 Command Stand
          2 Infantry Stands
          2 Weapons Stand

    "Nubian"  9th Volunteer Infantry Company
          1 Command Stand
          3 Infantry Stands
          1 Weapons Stand


 My Bosniak force was quite a powerful force, having a great deal of firepower in the volunteer infantry companies, quite a few tanks, and consisting of experienced and highly motivated troops. In terms of supporting assets it was very light, having only the 82mm mortar platoon as the sole artillery support, very light air defense in the form of the two Stinger teams, and no air support. Still, I was very confident of success as I had faith in my TOWs and my tanks to deal with any major opposition from Frank's Noddists. What could possibly go wrong?

To Be Continued...

Sunday, 6 May 2012

The 1979 Hakim Oasis Incident, Pt. 2.

The Archduke has put up two more parts of his very detailed AAR report on our game last Sunday. Part two is here, and part three is here. The Archduke's reports are quite good, and his photographs are superb. Full CD3 TOEs are listed here. My own efforts continue below:

Imperial forces on the move!

The Imperial forces resident in Hakim started a limited sweep across the town, whilst maintaining a sizable garrison within the Police station compound. Outside the town, the infantry of the Imperial relief column started to enter the outskirts of the town, while the relief column's armoured car company, and RCL company, moved to engage the first of Diesela Khann's technicals.

First blood to the Rebels!
The Imperials were somewhat surprised by the ability of technical mounted RCLs to take out armoured cars. This was matched by the ability of the Imperial forces to take out the technicals. as they are only soft vehicles, direct fire HE is quite effective on them!

A bad day for the Heavy group!
That, coupled with the low morale of the technicals, led to the surviving platoon failing its morale check and fleeing for cover in the Village of the Infidels. While the first of the mobile forces were engaged outside the town, the central thrust of the Imperial garrison's sweep towards the mosque encountered a group of the Arch Mullah's Brotherhood of the Faithful, and after a brief firefight, was forced back to the Police Station.

An Imperial infantry stand is halted in its advance towards the Mosque.

Surviving Diesela Khannite tribesmen take time to review the days events.

On the other side of  town, the forces of the PLFK advanced into the outskirts of Hakim, while government allied tribesmen moved to intercept them.The PLFK armour, nervous at the smell of camels, failed its morale and withdrew back to its original position. Meanwhile, the other Imperial armoured car company swept around the town, only to bump into the other group of technicals.

Another Saladin lost to RCL fire.
The usual exchange of fire occurred, only this time the technicals, aided by PLFK Saladins, managed to gain the upper hand. Two Imperial Saladins were destroyed with the third platoon forced back, atfer failing its morale.


And the return fire destroys the RCL armed technical.
 The RCL armed technicals were proving to be quite a powerful, if somewhat fragile unit.

But the Khand armoured cars manage to destroy another, and hit the other.

Although they lose one to return fire from the Imperial armoured cars.
The remaining technicals hold the field. Shortly after this picture they were reduced to burning wrecks by Imperial action.

 By this stage the Imperials had managed tom get a TOW stand into a position to engage the technicals. This resulted in the elimination of the technicals as a fighting force. The next logical step was for the Imperials to remove the threat of the PLFK armoured cars. The TOW armed Mule, and the two remaining Saladins of the relief column, started towards the PLFK Saladins. The mule out paced its armoured escort and was destroyed by the PLFK during the opportunity fire phase.

Imperial armoured cars ignore the Mullah's mortars and drive towards the PLFK armoured cars.

Burning Imperial armoured cars.
The survivor reflects on the days events.

 This exchange began a series of exchanges of fire between the two groups of armoured cars, as neither wished to take the risk of getting closer to increase the effectiveness of their fire, and thus that of the enemy.

 While both sides mobile elements were in the process of destroying each other, the Imperials made another effort to sweep through to the Mosque and solve their Mullah problem. Alas, for the Imperials, they managed to launch their attack after the PLFK had finally managed to link up with the Arch Mullah's troops. This resulted in a quite substantial increase in the available defenders for the Mosque.

The PLFK finally link up with the Arch Mullah's men.
And move to reinforce the mosque.

The Mosque became the focal point of the urban battle. At one stage it was only held by the Mullah, and two somewhat depleted stands of infantry.

 The Imperial assault was conducted by the dismounted infantry of the relief column, who had been working their way through the town towards the mosque all day. Had the rebels lost the Mosque, I would have conceded the day to the Imperials. Fortunately, I managed to roll well, and gun down the Archduke's Imperials.

The Imperial Motorised Infantry company launch their assault on the Mosque.
And are repelled.
The survivors are forced back.
The Mosque holds.
 Having the PLFK close enough to be able to consolidate the Mosque's defense, meant that there was little point in the trained bands of the Citizens' Defense Militia trying to achieve what the Imperial army had failed to do. 

Rebel forces plan their next move.
The imperial garrison prepares for night, and a siege.

The action ended at this point, as neither side quite had the forces to dislodge the other, and it was in the interests of the Mullah to renew operations under the cover of night - where the superior troop quality of the Brotherhood, and the PLFK, could be used to good advantage against the loyalist militias.

The last of the gunfire stops as both sides wait for night.
The days fighting resulted in both sides claiming a slide edge over the other, but since neither was able to dislodge the other from the town I feel it was most likely a draw. overall it was a very pleasant and enjoyable game, for which I must thank the Archduke for being such a genial opponent!
Wednesday, 2 May 2012

The 1979 Hakim Oasis Incident, Pt. 1.

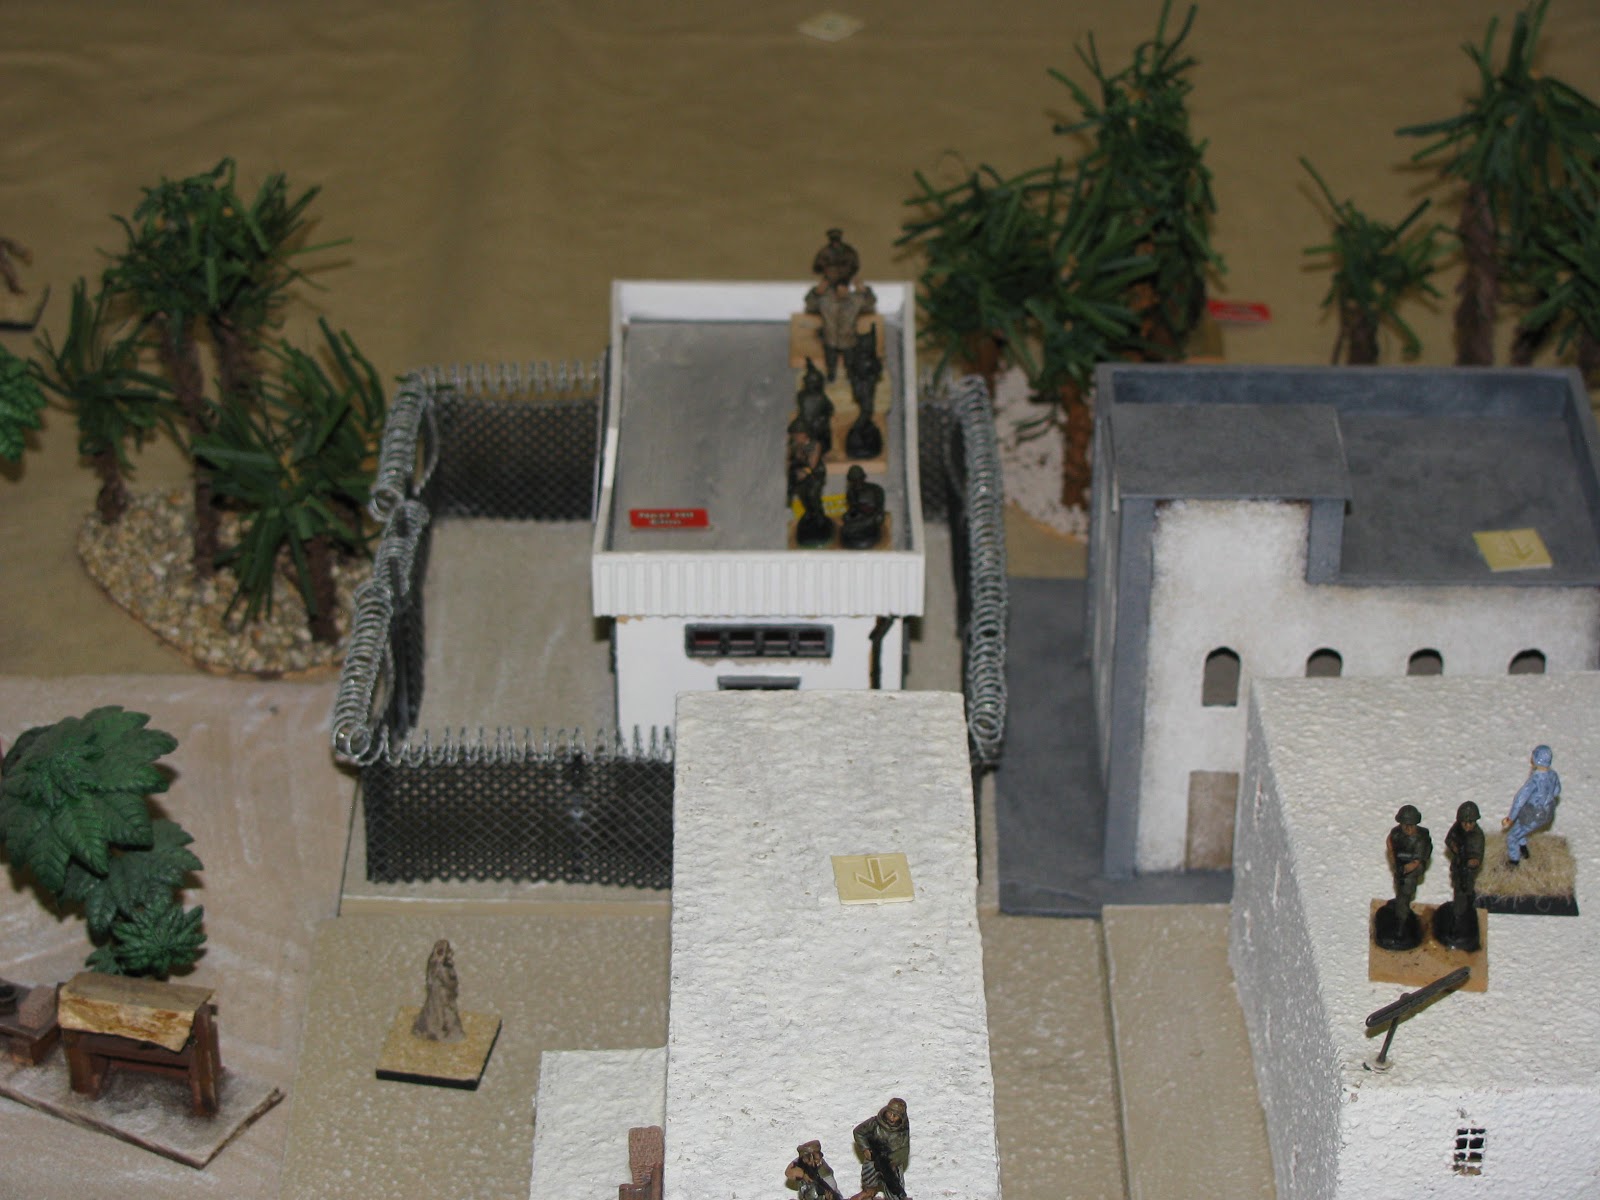
Last Sunday I played a game of CD3 Moderns with the Archduke down at the Woolston Club. The game itself was a nice little scenario set in Harad. The game took place in late 1979, a time of great uncertainty in Harad, in a small provincial town called Hakim, built around the Oasis of the same name. Hakim is a town in Northern Khand, a traditionally rebellious territory of the Empire. (The Archduke has a very nice write up of the game posted here. Plus the photos are much better.)

Hakim, named after the oasis.
Due to the rather ungrateful attitude of some of the Khandish locals to the benefits of Haradian rule, the Empire has stationed small military garrisons in the major settlements of Khand. These towns are administered by military governors, who report directly to the local provincial governor. Officers who receive the honour of of a military governorship in Khand, have often done so due to the result of committing a career limiting move at some earlier stage in their career.

For this game, I gave the Archduke the choice of four different factions. Once he had chosen his core force and faction, I would then given him the rest of this forces and explain to him the current situation as his faction saw it. The Archduke's initial choices were as follows:

.
Bringing the joy of Marxism to the People of Khand.

Peoples' Liberation Front of Khand (PLFK)-Troop Quality: Regular, Morale: 8.
 HQ w/
  1 Command  Stand
1 Infantry Company w/
   1 RPG-7 Team
   3 Infantry Stands
1 Armoured Car Company w/
   1 Command Saladin Armoured Car
   1 Saladin Armoured Car

The relief column, Friend or Foe?

Imperial Relief Convoy - Troop Quality: Experienced,  Morale: 9.
 Motorised Infantry Company w/
  1 Command  Stand
  1 Landrover
  2 Infantry Stands
  1 Weapons Stand
  3 Light trucks
  1 Mechanical Mule w/ TOW
1 Armoured Car Company w/
  1 Command Saladin Armoured Car
  1 Saladin Armoured Car


Just how loyal is the Governor?

 Imperial Garrison - Troop Quality: Experienced,  Morale: 9.
 Imperial Infantry Company w/
  1 Command  Stand (Military Governor)
  2 Infantry Stands
  1 Weapons Stand
  1 TOW Stand
 1 Armoured Car Company w/
  1 Command Saladin Armoured Car
  1 Saladin Armoured Car

The Arch Mullah has quite a few friends...

The Arch Mullah of Hakim - Troop Quality: Experienced,  Morale: 12.
Brotherhood of the Faithful w/
  1 Command  Stand (The Arch Mullah)
  1 Command  Stand
  2 Patrol Stands
  3 Infantry stands
  1  81mm Mortar Stand (DS)
  1 Ammo Porter Stand (DS)

The faithful are well equipped with WARPACT weaponry...

While the basic premise of the gane was that there existed possible revolt in Hakim,  exactly what the situation was going to be would be determined by the Archduke's choice. if he had chosen the relief column, then the rebellion was going to be led by the Governor in league with the PLFK, choosing the PLFK would have the relief column be in league with the PLFK against the Governor and the Mullah combined as Imperial loyalists, and choosing the Arch Mullah would have generated a large horde of the faithful against all comers.

Since the Archduke chose  to be the Governor, then the relief column was on his side, and the rebellion was that of the broad base Khandist Popular Front (KPF), with the Mullah's forces and the PLFK acting together for the sake of liberating Khand from the evil foreign oppressors....

It also meant that the Archduke's forces were increased, with each armoured car company gaining an additional Saladin, and the relief column gaining an additional company of 106mm Recoilless Rifles.

An expanded Relief Column prepares to advance.

 Imperial Heavy Weapons Company w/
  2 106mm RCLs
  2 Gun Crew Stands
  2 Light Trucks

Imperial forces were also swelled by the additional of the local Citizens' Defense Militia.

Citizens' Defense Militia - Troop Quality: Trained,  Morale: 8.
 Militia Infantry Company w/
  3 Infantry Stands

and if that wasn't enough, the Archduke also got to treat the Police HQ building as having the effects of  a Staff Radio Staff, for as long as the Governor remained within the building. Plus, he also got to dice to see if his rousing speech could sway addition forces to the Imperial cause - and it did! Additional forces came in the form of  local tribesmen, who provided a strong mounted element to the Archduke's force:

Mounted Tribesmen - Troop Quality: Trained,  Morale: 8.
Tribal Force w/
 1 Mounted Command Stand 
 2 Cavalry Patrol Stands
 4 Camelry Patrol Stands

Each pair of Patrol stands is able to combine into a Recon stand of the appropriate type.

Of course, the rebel forces also gained some additional reinforcements, firstly the PFLK also gained an additional Saracen for their armoured car company, and the KPF also gained the support of some of Diesela Khann's tribesmen, mounted in their technicals:

The 'Light Group" of Technicals - Diesela Khann drives again!

Tribal Motorised Force - Troop Quality: Trained,  Morale: 6.
Light Group w/
 1 Command Jeep
 1  Technical w/ 106mm RCL
 3 technicals w/ HMGs
Heavy Group w/
 1 Command Technical w/ 40mm AGL
 1 Technical w/ 40mm AGL
 1 Technical w/ 106mm RCL

Places everyone!  Ok?!  Action!

Now that both forces were sorted and deployed in their starting positions, the battle could commence! Stay tuned for part II soon.

EDIT: Minor typos corrected, and labels added.